Documentation
How to create APP roles
Follow the steps in this documentation to create the required roles for an APP connection.
Step 1 - Go to Security Console
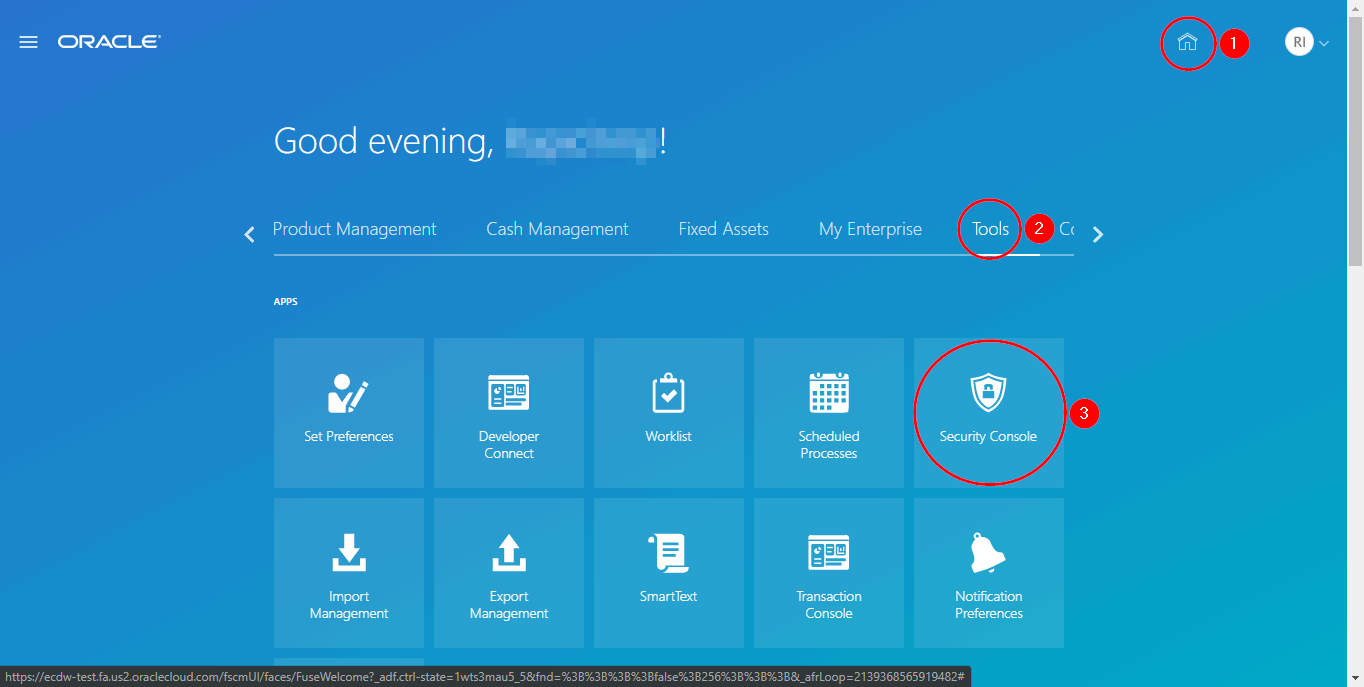
Go to the home page. Select Tools, and then Security console.

Step 2 - Add User Account
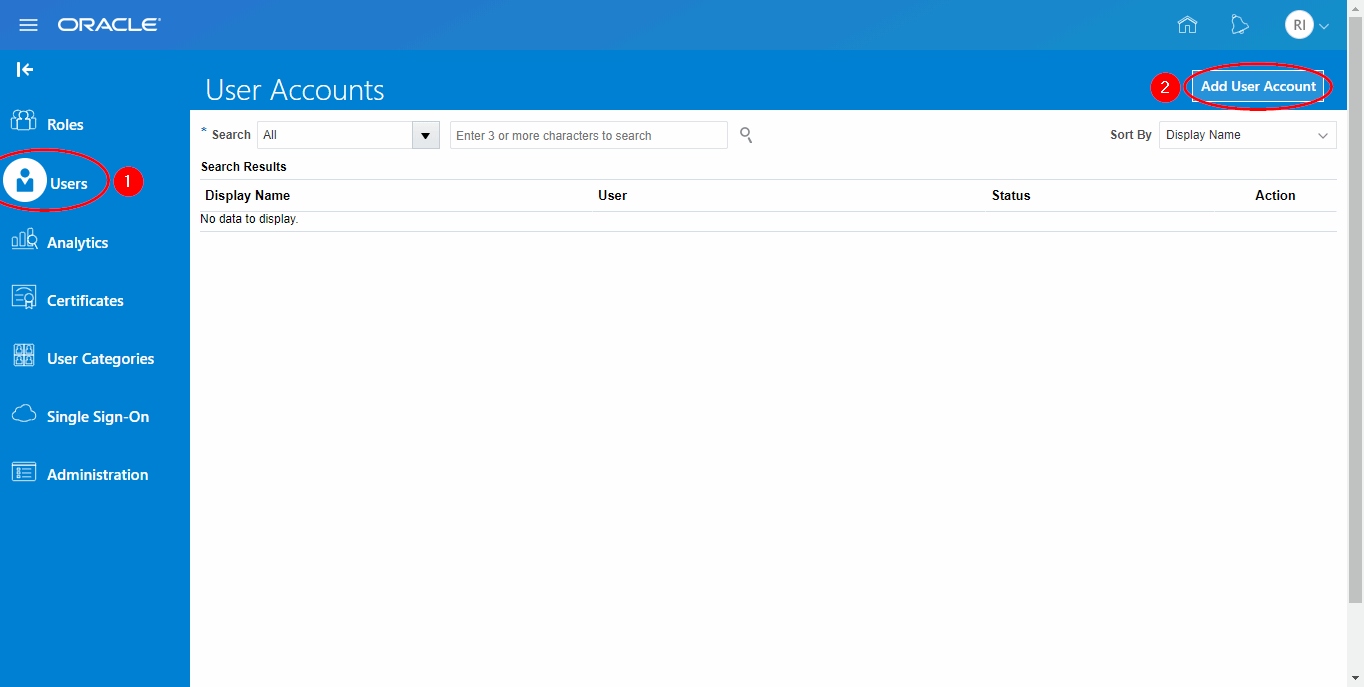
On the user page, click Add Usser Account.

Step 3 - Create user
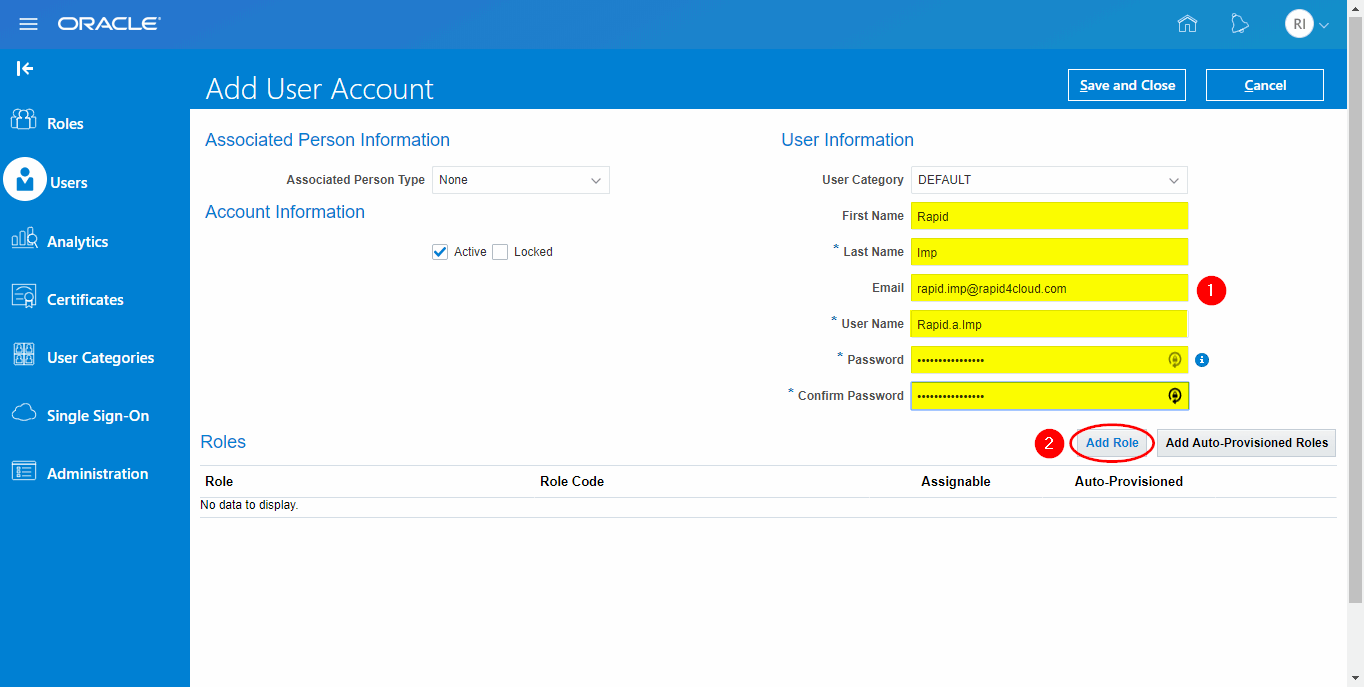
Fill the basic information for the new user account (User Category, First Name (Optional), Last Name, Email, User Name, Password), then click Add Role.

Step 4 - Add role
If you create an App connection to be used only as a source for Copy or Rollout, you can skip this step.
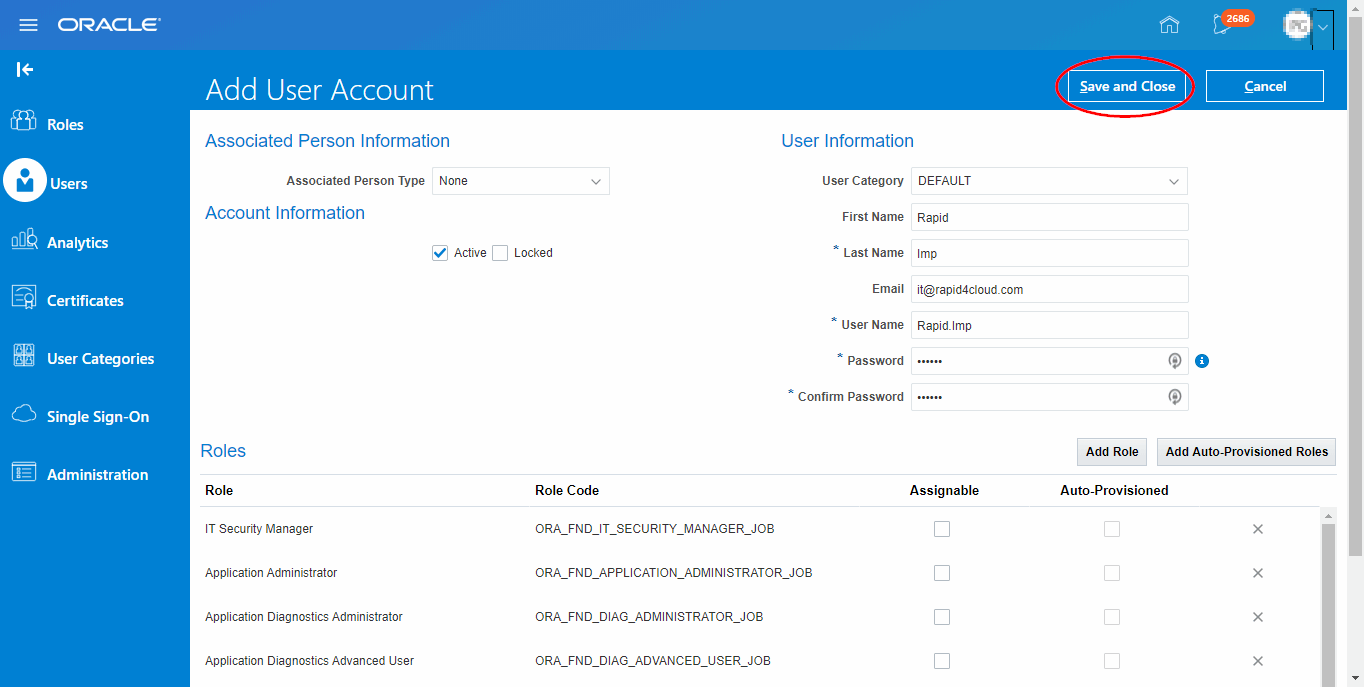
Assign all of roles below:
- IT Security Manager
- Application Administrator
- Application Diagnostics Administrator
- Application Diagnostics Advanced User
- Application Diagnostics Viewer
- Application Implementation Manager
- Application Implementation Administrator
- Application Implementation Consultant
- Functional Setups User

If the IT Security Manager role cannot be granted, please note that tasks requiring access to user roles and security—such as submitting the schedule process, Import User and Role Application Security Data, and/or loading Custom Roles and Custom Duties—may not be accessible or configurable.
The following roles are possible roles to assign to users for each area of the application. Please assign the appropriate role to the user to provide access on each Product/Module/Task.
Financials
- Accounts Payable Manager
- Accounts Payable Specialist
- Accounts Payable Payment Supervisor
- Accounts Receivable Manager
- Accounts Receivable Specialist
- Asset Administrator
- Asset Accounting Manager
- Expense Audit Manager
- Expense Manager
- General Accounting Manager
- Tax Administrator
- Tax Manager
Procurement
- Buyer
- Category Manager
- Procurement Application Administrator
- Procurement Catalog Administrator
- Procurement Manager
- Inventory Manager
Important: the user must be a Procurement Agent.
Project Management
- Project Accountant
- Project Administrator
- Project Application Administrator
- Project Billing Specialist
- Project Manager
- Time and Labor Administrator
- Time and Labor Manager
Supply Chain Management
- Cost Accountant
- Order Manager
- Order Entry Specialist
- Materials Planner
- Warehouse Manager
- Pricing Administrator
- Pricing Analyst
- Pricing Manager
- Product Data Steward
- Demand and Supply Chain Planner
- Supply Chain Application Administrator
- Supply Chain Planning Application Administrator
- Supply Chain Operation Manager
- Supply Chain Planner
Manufacturing Management
- Product Configurator Manager
- Product Design Engineer
- Product Design Manager
- Product Manager
Global Human Capital Management
- Human Capital Management Application Administrator
- Human Capital Management Integration Specialist
- Human Resource Manager
Benefits Management
- Benefits Administrator
- Benefits Manager
- Benefits Specialist
Step 5 - Save user
As final step, don’t forget to save the new user.
 s
s
